If you’ve ever wondered how to get that dreamy, slightly runny yolk with firm whites, let me tell you—you’re in for a treat. Jammy eggs are the unsung heroes of the culinary world. They’re simple, versatile, and so satisfying. Whether you’re dressing up a salad, topping a bowl of ramen, or just need a quick protein-packed snack, jammy eggs are the answer. Their balance of firm whites and gooey yolks feels almost magical, doesn’t it?
The way they ooze golden richness with every slice is pure joy. Plus, they’re so easy to whip up that even kitchen newbies can nail it on their first try. Once you make these, you’ll see how effortlessly they can transform any dish—making it look and taste gourmet. Seriously, they’re like a little secret weapon for your meals. Let’s crack into the details (pun totally intended).
What Are Jammy Eggs?
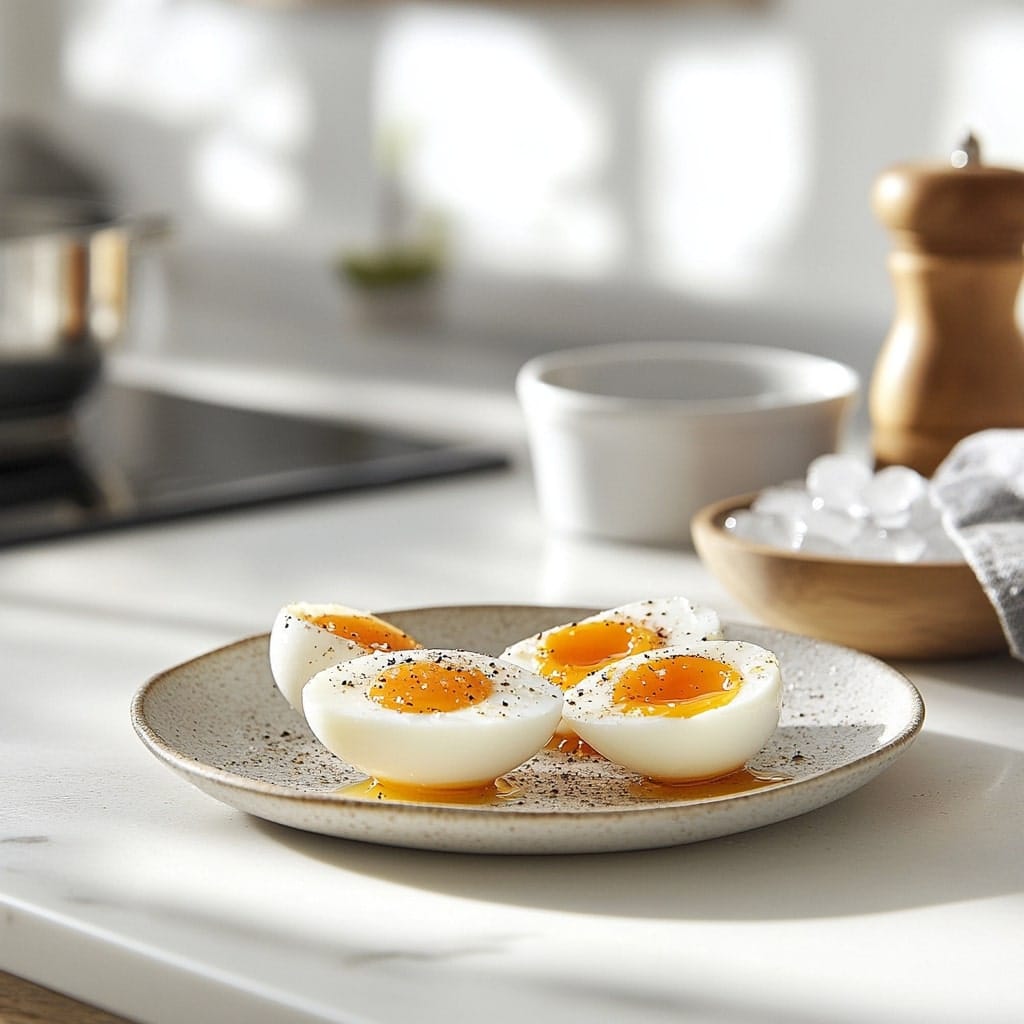
Before we get into the recipe, let’s talk about what makes these eggs so special. Jammy eggs sit somewhere between hard-boiled and soft-boiled, achieving the best of both worlds. The whites are fully cooked, firm, and smooth to the bite, while the yolk remains luscious, creamy, and golden, almost like a silky jam. It’s that perfect texture contrast—a tender outer layer paired with a rich, oozy center—that makes them such a delight.
These eggs aren’t just pretty to look at either. They’re brimming with flavor, with the yolk adding a luxurious, almost buttery taste to whatever dish you’re creating. Whether sliced atop a salad, tucked into ramen, or savored all on their own with a sprinkle of salt, jammy eggs are a treat for your taste buds. Once you try them, you’ll understand why they’ve earned a cult following among food lovers everywhere.
Ingredients for Jammy Eggs
Here’s what you’ll need:
- 6 large eggs (or however many you’re craving)
- Water for boiling
- Ice cubes or cold water for an ice bath
- Salt and pepper (optional but recommended)
That’s it. I know—it’s almost too easy.

Step-by-Step Jammy Egg Recipe
Start with Room Temperature Eggs
If your eggs are fresh from the fridge, let them sit out for about 10 minutes. This small step is worth the wait, trust me. When eggs are cold, they don’t cook as evenly, and you could end up with overcooked whites while waiting for the yolks to reach that gooey, jammy perfection.
By bringing them to room temperature, you’re setting yourself up for success—no rubbery whites or overly firm yolks here! And let’s face it, it’s way easier to handle eggs that aren’t icy cold. While you’re waiting for them to warm up, you can prep your pot of water or get your ice bath ready. See? Multitasking for the win. Once your eggs are warmed up and ready to go, you’ll notice the difference in how beautifully they cook.
Boil the Water
Fill a medium pot with enough water to fully cover the eggs. It’s important to ensure there’s enough water so that the eggs cook evenly and don’t touch the bottom of the pot directly, which could lead to uneven spots. Bring the water to a rolling boil over medium-high heat. This stage of boiling should be lively enough that you see consistent bubbles breaking the surface—not just little ripples.
The goal here is to have the water ready to maintain a steady temperature as soon as the eggs are added, ensuring a perfect cook. Take a moment to make sure the water level is sufficient before proceeding. A pot that’s too small can overcrowd the eggs, leading to inconsistent results. If you’re prepping for a bigger batch, use a larger pot for best results. Timing and space matter here!
Curious about what makes a perfect jammy egg? It all starts with understanding the science behind boiling eggs. Learn how temperature, time, and water dynamics affect your results in this fascinating guide on The Science of Boiling Eggs. Discover the key to consistent, delicious eggs every time!
Gently Add the Eggs
Lower the heat slightly to maintain a gentle boil. A vigorous boil can be too rough on the eggs, causing them to crack or jostle too much, which might affect their perfect shape. So, reduce the intensity until the water is gently bubbling—think calm and steady, like a simmer with a little extra energy.
Next, use a spoon or ladle to carefully lower the eggs into the water one at a time. This step is crucial because simply dropping the eggs in could cause them to crack or splash boiling water, which nobody wants. Be patient and deliberate here; taking a few extra seconds to lower the eggs gently will save you from a mess and ensure perfectly cooked jammy eggs every time. No splashing allowed—that’s the golden rule for this step!
Set the Timer
For jammy perfection, set your timer for 6 minutes and 30 seconds. This timing is the sweet spot for firm whites and gooey yolks. Trust me, this isn’t just a random number—it’s the result of trial, error, and a whole lot of eggs. Six minutes and thirty seconds ensures the whites are fully cooked but still tender, while the yolk achieves that luscious, jam-like consistency that melts in your mouth. Precision is key here, so don’t guesstimate. Use a reliable timer (even your phone works) and start it the moment the eggs hit the water.
If you prefer experimenting, you can try adjusting the time slightly based on how runny or set you like your yolks, but for most people, 6 minutes and 30 seconds is the gold standard. Once you’ve nailed this timing, you’ll never look at boiled eggs the same way again!
Prepare an Ice Bath
While the eggs are boiling, fill a large bowl with ice and water. This step might seem small, but it’s the unsung hero of this recipe. The ice bath stops the cooking process instantly, locking in that jammy goodness we’re all after. Without this quick cooldown, the eggs would continue cooking from residual heat, and you’d miss out on that perfectly gooey yolk.
Take your time to get the water icy-cold—throw in a generous handful of ice cubes, and don’t be shy about it. The colder the water, the faster the cooling. Also, if you’re boiling multiple batches, refresh the ice bath to keep it cold and effective. Think of this step as your safety net for ensuring your eggs reach their full jammy potential. Skipping it? That’s a rookie mistake!
Transfer to the Ice Bath
Once the timer goes off, use a slotted spoon to carefully transfer the eggs to the ice bath. This step is more than just a cooling-off period; it’s essential to halting the cooking process completely, locking in that perfect jammy yolk. The sudden temperature change shocks the eggs, ensuring the yolks stay creamy and the whites maintain their delicate firmness.
Let them chill for at least 5 minutes—patience pays off here! During this time, the ice bath works its magic, not only cooling the eggs but also loosening the shells, making them significantly easier to peel. If you’ve ever wrestled with stubborn eggshells, you’ll appreciate how this trick saves time and frustration. Plus, perfectly peeled eggs look stunning whether they’re sliced in half for a dish or served whole. Trust me, this step is worth every second.


Peel and Serve
Gently crack the shell on a hard surface and peel under running water, letting the water help separate the shell from the egg. This technique minimizes any accidental tearing of the delicate egg whites. Once peeled, place the eggs on a clean cutting board and slice them in half with a sharp knife for that perfect cross-section reveal. Sprinkle generously with salt and freshly ground pepper to enhance the natural flavors of the yolk and whites.
For an extra twist, consider adding a dash of smoked paprika, chili flakes, or even a drizzle of soy sauce for a flavorful boost. Serve them as-is, pair them with your favorite toast, or use them to top off a hearty salad or a steaming bowl of noodles. Whatever the occasion, these jammy eggs are sure to impress and satisfy!

If you’re loving this jammy egg recipe, you’ll definitely want to check out more delicious ideas in our breakfast category! From hearty options to quick and easy recipes, we’ve got everything you need to start your day right. Whether it’s fluffy pancakes, protein-packed bowls, or a classic avocado toast topped with jammy eggs, there’s something here to inspire your mornings. Dive in and explore your next favorite breakfast creation!
Tips for the Perfect Jammy Eggs
Use older eggs. Fresh eggs are harder to peel. If you’ve got some that have been sitting in the fridge for a week or two, those are your best bet. Older eggs have a slightly larger air pocket, which helps separate the shell from the egg during cooking, making peeling a breeze. Plus, you won’t waste time wrestling with stubborn shells—and your eggs will stay perfectly smooth and intact.
Don’t skip the ice bath. It’s tempting to rush, but trust me, the ice bath is crucial for stopping the cooking process. Without it, the yolks might overcook, losing that signature jammy texture. This simple step also ensures the eggs cool quickly, preventing any grayish discoloration around the yolks. If you’ve ever seen that unappetizing greenish tint, the lack of an ice bath might be to blame.
Experiment with timing. If you like your yolks slightly runnier, shave 30 seconds off the cooking time. Prefer them more set? Add 30 seconds. Don’t be afraid to play around—timing adjustments can help you achieve your perfect yolk consistency, whether it’s more jam-like or closer to creamy. Just keep a timer handy to replicate your ideal results every time.
How to Use Jammy Eggs
Okay, you’ve made the eggs. Now what? The beauty of jammy eggs is their versatility. Here are some delicious ideas:
Ramen Topping
Jammy eggs are a staple in ramen bowls. Slice them in half and place them on top of the noodles for that authentic touch. The gooey yolk mixes with the broth, creating a rich, flavorful layer of deliciousness. It’s an instant upgrade to any bowl of ramen.
Salad Booster
Add sliced jammy eggs to your salad for a creamy texture and extra protein. They pair especially well with spinach and avocado. Want to make it fancier? Sprinkle some crumbled feta cheese and a drizzle of balsamic glaze for a salad that’s as satisfying as it is nutritious.
Toast Upgrade
Spread some avocado on toast and top it with jammy egg halves. Sprinkle with red pepper flakes for a bit of heat. For an extra indulgent breakfast, try adding crispy bacon or a slice of smoked salmon. This combo is a surefire way to start your day right.
Snack Time
Sometimes, you just need a quick bite. Sprinkle a little salt on a jammy egg and eat it whole—so satisfying. Need a portable snack? Wrap a peeled jammy egg in parchment paper and take it on the go. It’s a healthy and delicious alternative to pre-packaged snacks.
Why Jammy Eggs Are So Popular
Jammy eggs have become a favorite because they strike the perfect balance between taste, texture, and convenience. They’re packed with nutrients like protein, healthy fats, and vitamins, making them a wholesome addition to any meal. Plus, they look fancy without actually being hard to make.
Whether you’re a beginner in the kitchen or a seasoned home chef, jammy eggs are a guaranteed win. Their stunning appearance and incredible flavor make them Instagram-worthy and palate-pleasing all at once. It’s no wonder they’ve become such a trending food.
Common Mistakes to Avoid
Even though jammy eggs are easy, a few common mistakes can mess things up:
- Skipping the timer. Precision matters here! Overcooking will turn the yolk chalky, robbing you of that gooey texture. Make sure to set a reliable timer and stick to it for consistent results.
- Not enough water. Make sure the eggs are fully submerged for even cooking. Using too little water can lead to unevenly cooked eggs and dry, rubbery whites. Avoid this by ensuring your pot is large enough for the task.
- Rushing the peel. Let them sit in the ice bath long enough—impatience can lead to messy peeling. Take your time cracking and peeling the eggshells gently to avoid tearing the delicate egg whites.
How to Store Jammy Eggs
Got leftovers? Store peeled jammy eggs in an airtight container in the fridge. They’ll stay fresh for up to 3 days. If they’re unpeeled, you can store them for about 5 days. To enjoy them at their best, let them come to room temperature for a few minutes before eating. Cold jammy eggs are still delicious, but the flavors shine even more when they’re slightly warmed up.
FAQs
Can I make jammy eggs in advance?
Absolutely! They’re great for meal prep. Just follow the recipe, store them in the fridge, and use them within 3 days for the best taste. For added convenience, peel them before storing so they’re ready to grab and eat.
Why are my yolks turning greenish?
A greenish ring around the yolk means the eggs were overcooked. Stick to the 6-minute-and-30-second rule, and use an ice bath to stop the cooking process. The ice bath is your best friend for keeping the yolks golden and gorgeous.
Can I season the eggs while cooking?
Not really. Seasoning works best after they’re cooked and peeled. A sprinkle of salt, pepper, or even some chili flakes can make them pop. If you’re feeling adventurous, try soy sauce or a drizzle of sesame oil for an umami kick.
What’s the best way to peel jammy eggs?
Gently crack the shell all over, then peel under running water. This helps loosen the membrane and makes peeling easier. Running water acts like a lubricant, ensuring the delicate whites stay intact.
Final Thoughts about Jammy eggs
Jammy eggs might just become your new obsession. They’re simple, delicious, and fit into almost any meal. Plus, once you get the timing down, they’re foolproof. So grab some eggs, set that timer, and get ready to enjoy the gooey goodness.
Have your own favorite jammy egg tips or toppings? Share them below—I’d love to hear how you’re making them your own!


